
Save & Load Settings
Save all calibration and setup settings to a USB flash drive to back up a machine, or load them onto another MASSO to set it up quickly. You can also save a readable printable file and take screenshots.
Applies to
MASSO G3 and G3 Touch
Screen
F1-Setup › Save and Load Calibration Settings
You need
USB flash drive
INFORMATION
The Wi-Fi network security key is never saved to the file. After loading settings on another controller, enter it again.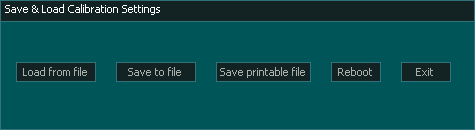
Files go in the MASSO › Machine Settings folder on the USB drive. Sending these files to support helps diagnose setup problems.
Save settings to file
1
Insert a USB flash drive and go to the F1-Setup screen.
2
Open Save and Load Calibration Settings.
3
Click Save to file. MASSO writes
MASSO_Settings.htg and MASSO_Tools.htg to the drive.Load settings from file
1
Put the
.htg files in MASSO › Machine Settings on the USB drive and insert it.2
On the F1-Setup screen, open Save and Load Calibration Settings.
3
Click Load from file. Loading the tool table is optional.
4
Restart the controller.
CAUTION
Loaded settings take effect only after the controller restarts. Do not run the machine before restarting.Printable settings file
A readable text copy of every setting. It can't be loaded back into MASSO, but it's useful as a record, for checking settings after a software update, and for sending to support.
In the same window, press  . The file is saved to MASSO › Machine Settings.
Screenshots
Saves the current screen as a .BMP file named Print Screen-001, -002 and so on, in MASSO › Screenshots. The screen freezes briefly while it saves.
 , then press the button below the 9 key
 .

