Spanish
  French
  German
  Simplified Chinese
 Mill Tool Calibration Steps
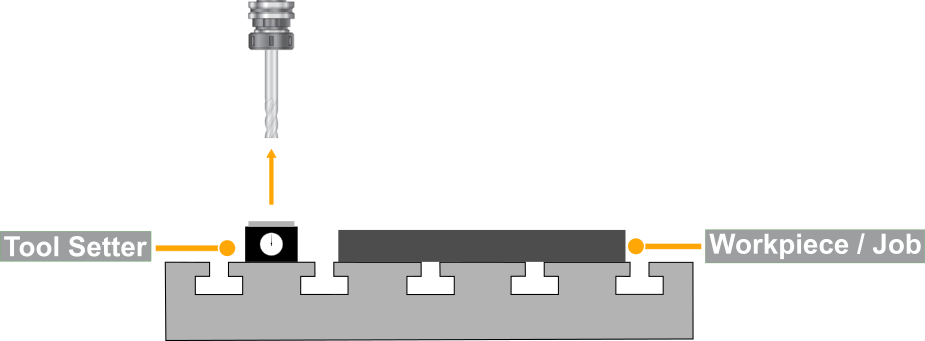
For routers and milling machines, tool length can be calibrated for manually or automatically by using a tool setter or a simple touch plate.
INFORMATION: More information about Touch Probe and Plates setup can he found on this link CLICK HERE
Step 1: Place the tool setter at a predefined position on the machine.
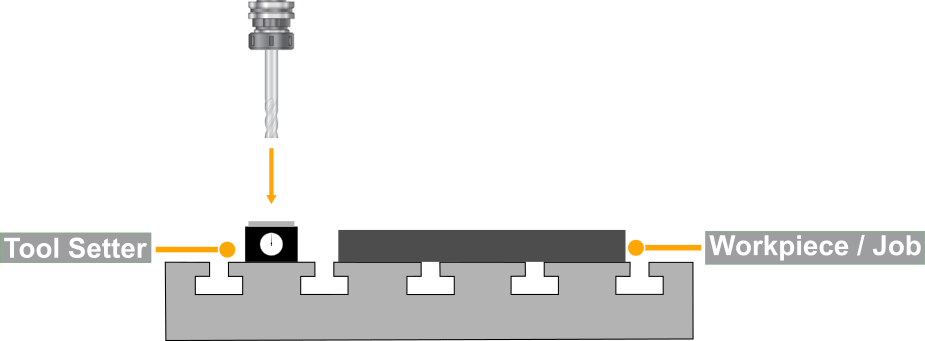
Step 2: On MASSO go to F3-JOG screen, next move the tool in position on top of the tool setter and touch the tool till the tool setter shows exactly 0.00.
CAUTION: Once in position DO NOT MOVE the tool before completing the next step.

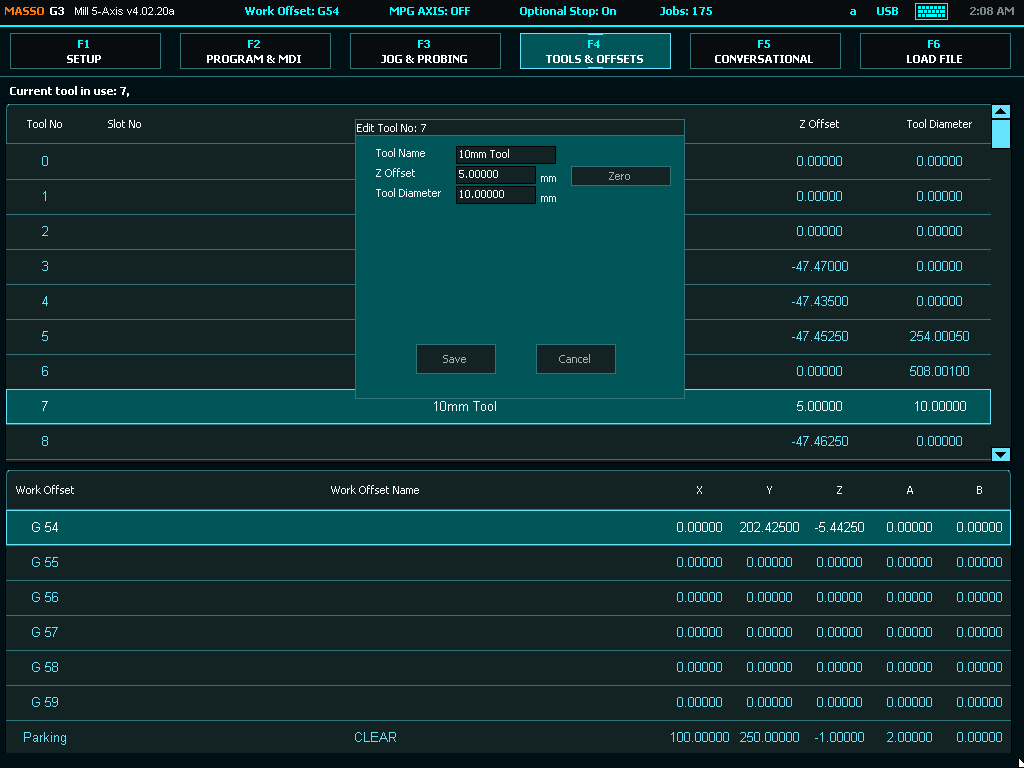
Step 3: On MASSO go to the F4-Tools screen and select the tool number you would like to assign to this tool. Now press the enter key to open the Edit Tool window.

Step 4: In the Edit Tool window give a tool name as per your requirement. Next move the click the Zero button to automatically calibrate the tool, MASSO will calculate the tool height and automatically fill the Z Offset value. Now the tool diameter can be entered if required and press Save button to save and complete the calibration process.
Step 5: Once the tool has been calibrated, please go to F3-JOG screen and move tool away from the tool setter.