

 Spanish
  French
  German
  Simplified Chinese
 Probing Touch Plate
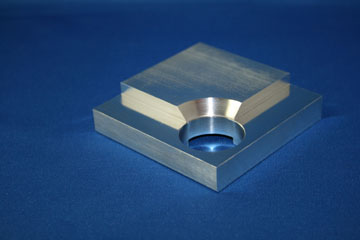
The Probing touch plate is similar to a 3D touch probe in that it can be used to zero the tool to the material and can also be used to set the X & Y zero point.
These touch blocks are typically designed to lock into the corner of your material with a hole directly above where the corner of you material will be located.
A simple hole probing routine will locate the X,Y zero point.
When probing the height above the material the flat area on top is probed to set the Tool Z height.
If only the tools Z zero is required then a simpler probing touch plate can be mage from a flat piece of aluminum or similar.
If only the Tool Z zero is required a touch off with a built in switch can also be used.
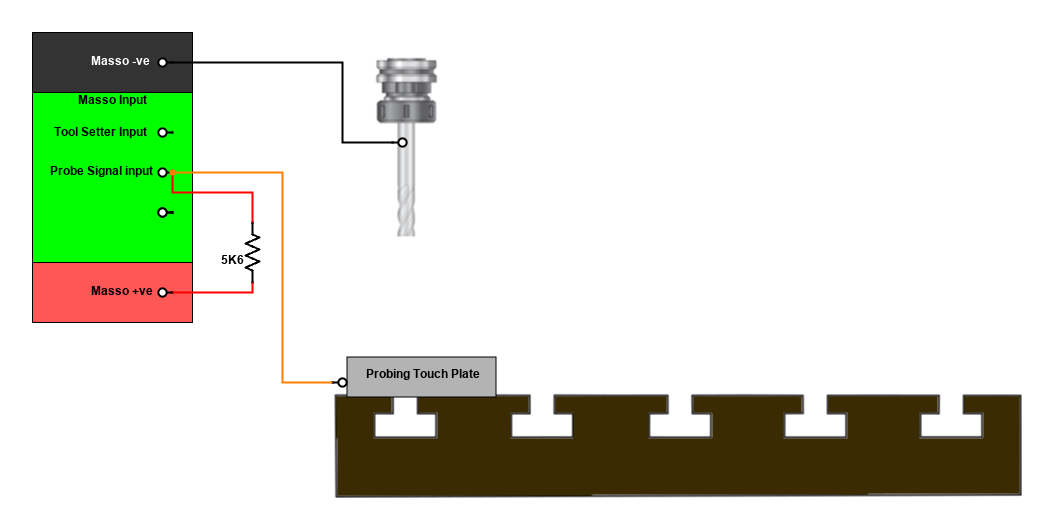
Wiring example of a simple Probing touch plate
- The Z probe offset value is used when used to compensate for the thickness of the Probing Touch Plate thickness.

- See top of Part probing for more information
Probing cycles
The Probing touch plate can be used with the interactive probing cycles.
CAUTION: It is advisable to quickly test your touch probe before starting a probing cycle to ensure it is working properly. This is done by triggering the Probe and observing the  indication at the top of the screen. When triggered the indication will change green
  This is done by touching the probe tip in case of a 3D touch probe or by tapping the plate against the tool in case of a probing plate.
The Probing touch plate can be used with Gcode G38.2 probing cycles.
Combining the Tool setter touch plate and Probing touch plate
If you use a Touch plate for your tool setter and also wish to use it as a probing touch plate you can do this by connecting the Probe input and the Tool setter inputs together as shown below.
