Spanish
  French
  German
  Simplified Chinese
 Scribe Tool
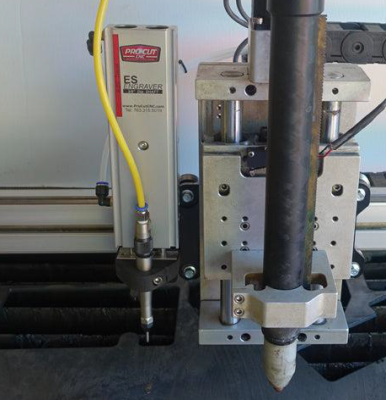
The scribe tool is generally used with Plasma but can be used for other setups as well.
- Tool 115
- To change to Waterjet issue a T115 M06 command in MDI and include this in your Gcode file to ensure that it changes to the correct screen when you run your Gcode file
- This tool is commonly used as part of a Plasma torch setup for marking material.
- The X, Y & Z offset relative to another head can be entered in the Multi-Head Setting page
- An output is assigned to move the scribe tool up and down as needed.
- An output is provided to turn the scribe on and off.

Assigned Scribe Outputs

Multi-Head Setting
F2 Screen
Configuration
- Enable Scribe in the Multi-head screen.
- Assign an output for Scribe up /Down.

- Assign an output for Scribe on/Off.

- Enter the X, Y and Z axis offset from the reference tool into the Scribe Multi-Head setting screen. This would be the Main spindle or Plasma torch in most setups.
Scribe Logic
- Scribe up/Down output will go High. This output is used to push the scribe down into position.
- M3 is used to turn on the Scribe
- M5 is used to turn off the Scribe.
- If a different tool is selected the Scribe up/Down output will go Low which will pull the scribe up into the idle position.
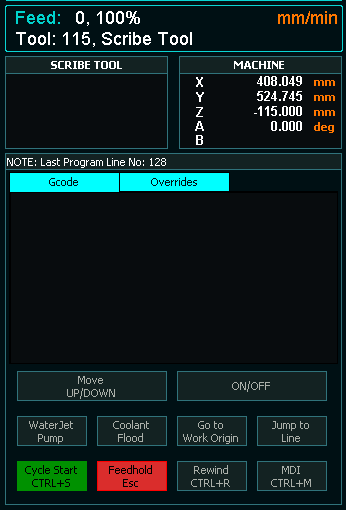
- There are buttons on the F2 Screen when Scribe is selected which allow the user to move the Scribe up and down as well as turn the Scribe on and off as needed.
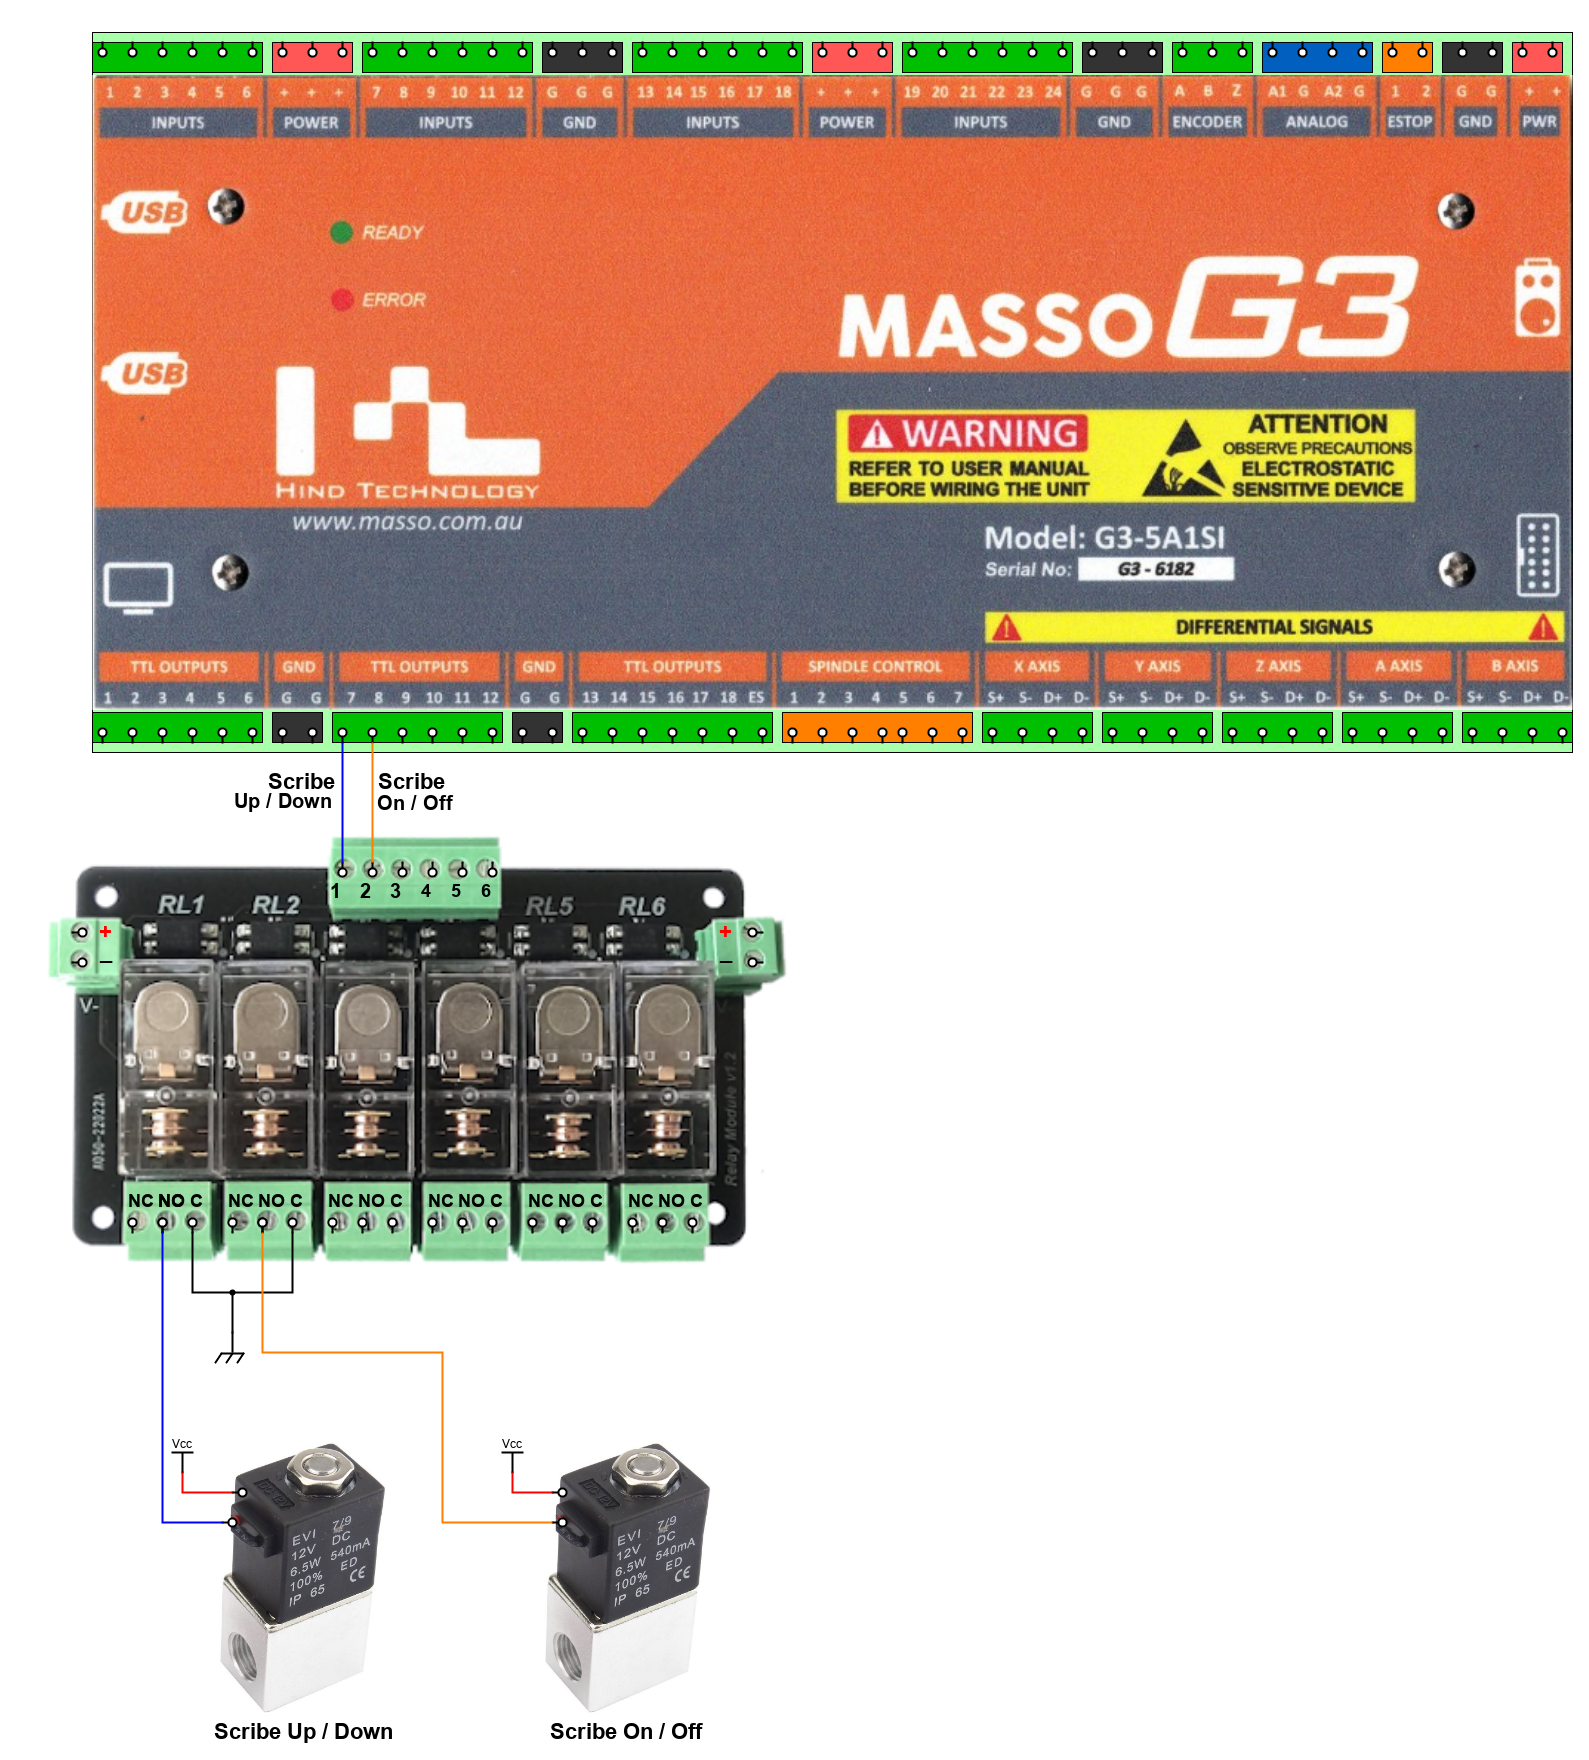
Wiring a Pneumatic Scribe
In this example the Scribe is pushed down into position using a pneumatic cylinder controlled by an air solenoid and the scribe is air driven so a 2nd air solenoid is used to turn on the air to make the scribe vibrate. If the Scribe is electric or the Scribe is moved into position using a linear actuator the solenoids would be removed and the actuator and Scribe would be driven directly from the Relay.
Example wiring diagram